Browse Repository
You can browse a repository by starting Git Extensions and select the repository to open. The main window contains the revision graph (commit log). You could also open the ‘Browse’ window from Windows Explorer and from Visual Studio.
The Browse window contains of several parts:
The Left panel, Tabs and the toolbar can be hidden, as well as showing the Commit tab as a panel in the revision graph.
Main toolbar
The main toolbar in Browse contains contains menus for other commands like Commit, Stash and Maintenance.
Revision graph
The full commit history can be browsed. There is a graph that shows branches and merges. You can show the difference between any two revisions by selecting them using ctrl-click.
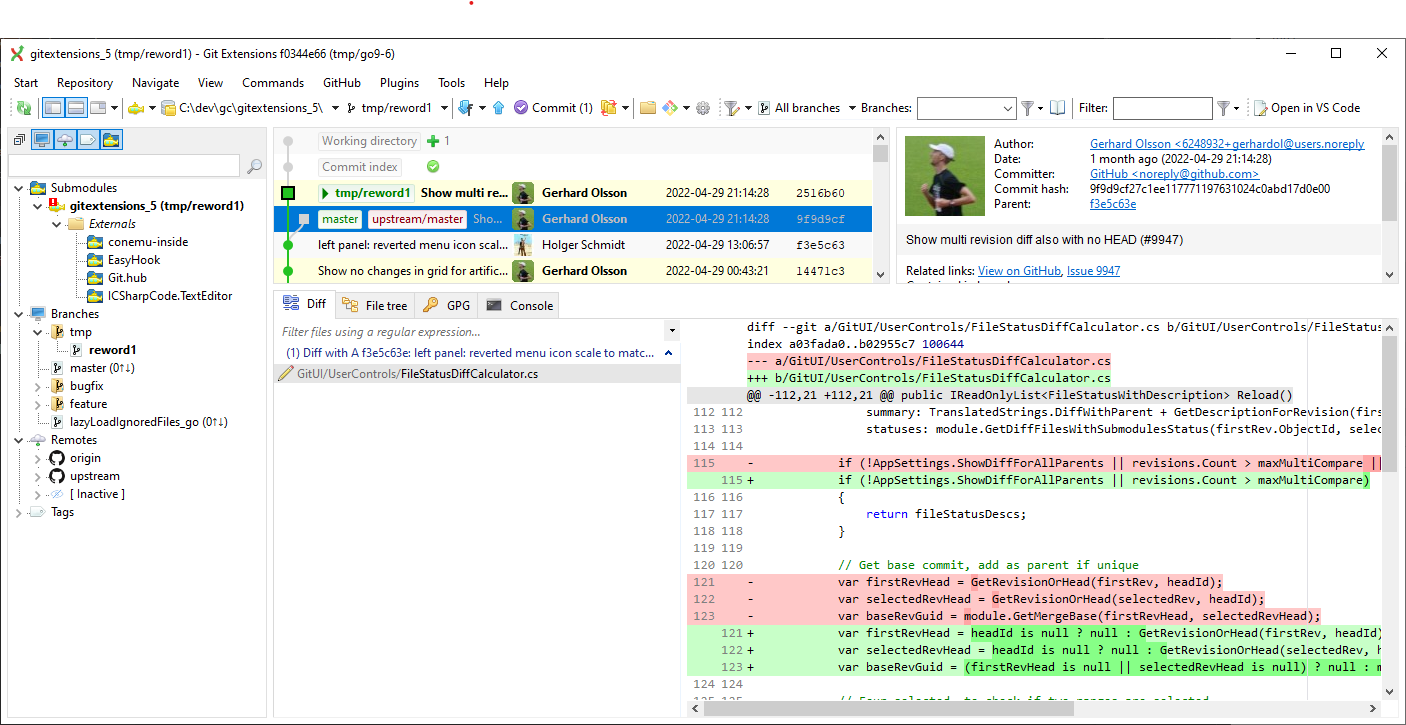
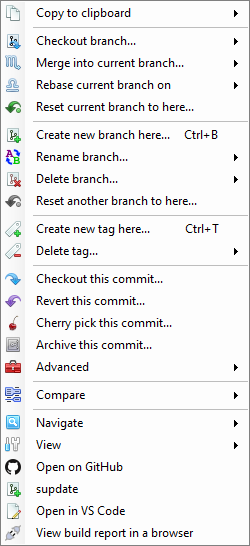
The context menu for a commit can both execute Git commands and change the appearance for the form.
Search
You can find text in the commit messages or jump to a specific commit in the current commit history shown in Git Extensions.
Quick search in history
You can find a commit in the commit history that is shown in Git Extensions by searching for text in the commit message,
branch label or tag. This is a quick search function. Simply click into the commit history to give that pane focus and
start typing. Git Extensions will show your search term in the top left corner and will immediately jump to the next
commit with matching text. You can search for the next or previous commit with matching text using Alt-Down Arrow or
Alt-Up Arrow.
In Settings, Git Extensions you can change the timeout for typing the text for the quick search.
Filter
You can also filter the commit history so that fewer commits are shown.
Filter history
The history can be filtered using regular expressions and basic filter terms. Filtering will reduce the number of commits that are shown in the Git Extensions commit history. The quick filter in the toolbar filters by the commit message, the author and/or the committer.
Advanced: Also Branches and Filter (with Commit message set) text boxes accepts git-log arguments if the
first argument starts with --. Separate the arguments with spaces.

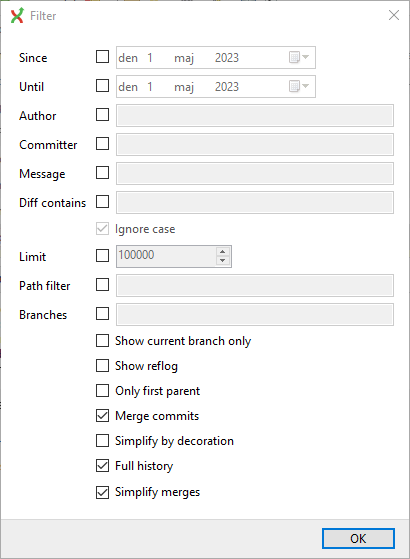
In the toolbar or context menu of the commit log you can open the advanced filter dialog. The advanced filter dialog allows you to filter for more specific commits.
When a filter is set, the icon for the advanced filter is changed and you see the current filter as a tooltip for the button. To remove the filter either remove the filter in the toolbar and press enter or remove the filter in the advanced filter dialog.
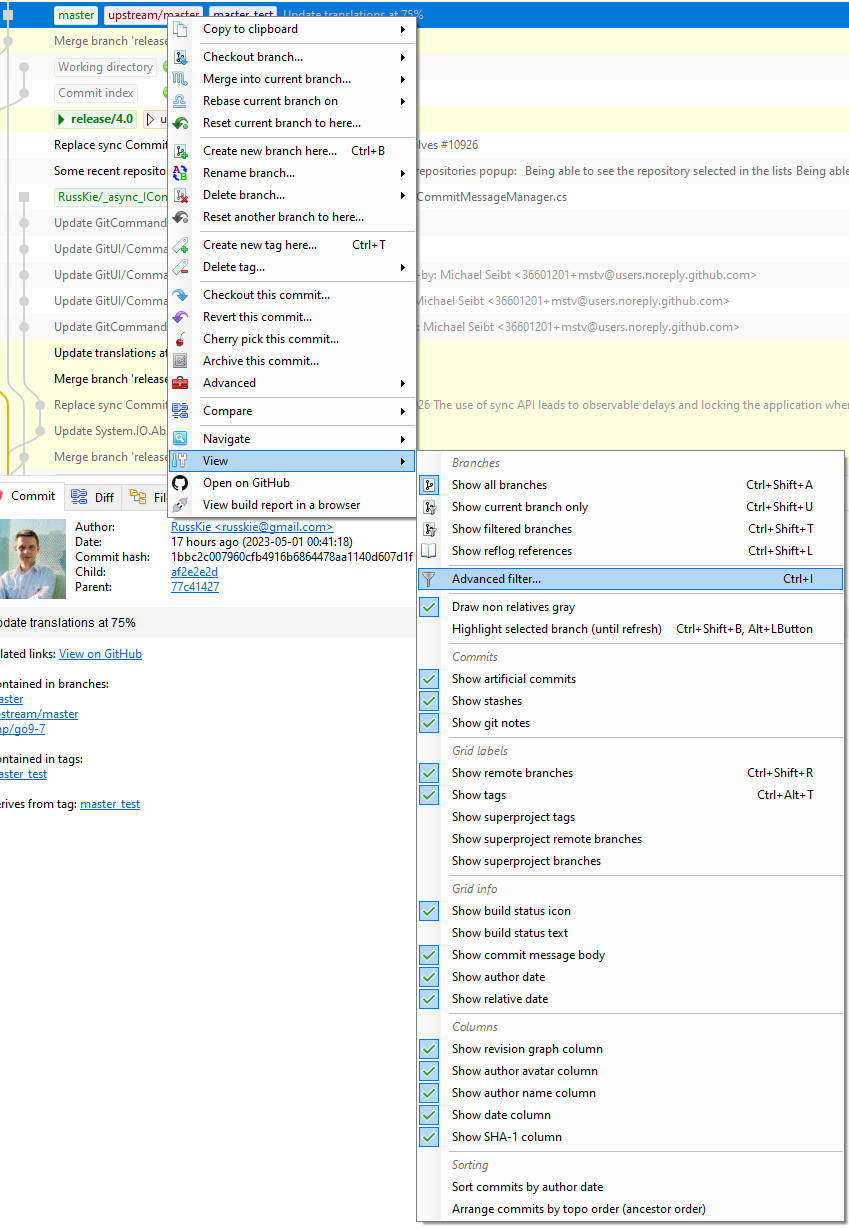
Reflog
By default, Git will not show any commits that are not reachable and do not have any references, such as a branch or a tag.
See git reflog.
Such commits will be purged when Git runs maintenance.
By enabling Reflog via the toolbar button or in the View menu these commits will be shown too.
Tabs
For settings and further description, see Tabs.
Commit
Commit information and message as well as branch and tag information for the selected commit. This tab can be moved to the revision grid.
Diff
See also Show file differences for all parents in browse dialog and Show all available difftools
The file viewer will by default show the diff, but may also show Blame for the selected file.
File tree
Show the file tree for the commit. (For worktree, only files tracked by Git are listed.)
The file list can be filtered for contained text and for file names using regular expressions.
The file viewer will by default show the file contents, but may also show Blame for the selected file. (Blame does not include uncommitted changes, not even if an artificial commit “Working dir” or “Index” is selected.)
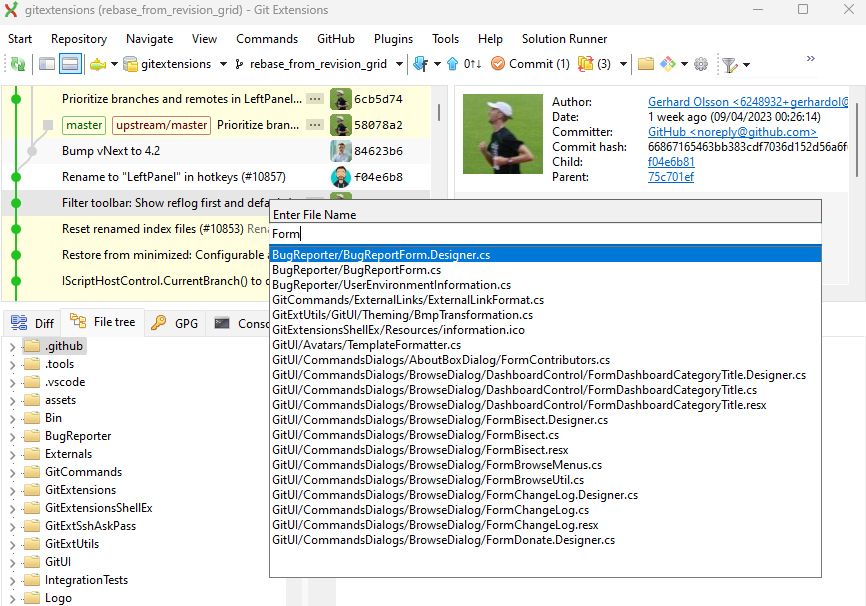
You could search a file in the file tree using the default keyboard shortcut Ctrl + Shift + F (configurable in Hotkeys).
GPG
Show the GPG key for signed commits.
Console
Show Git terminal.
Build report
Optional, only shown if the build server plugin is configured for the repo and if it has found a build for the selected commit. Show build result page
Left panel
Show local and remote branches, git remotes, tags, submodules and stashes.