Remote feature
Git is a distributed source control management system. This means that all changes you make are local. When you commit changes, you only commit them to your local repository. To publish your local changes you need to push. In order to get changes committed by others, you need to pull.
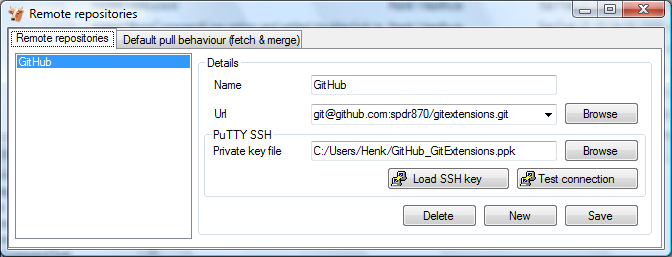
Manage remote repositories
You can manage the remote repositories in the Remotes menu.

When you cloned your repository from a public repository, this remote is already configured. You can rename each remote for
easy recognition. The default name after cloning a remote is origin. If you use PuTTY as SSH client you can also enter the
private key file for each remote. Git Extensions will load the key when needed. How to create a private key file is described
in the next paragraph.
In the Default pull behaviour tab you can configure the branches that need to be pulled and merged by default. If you
configure this correctly you will not need to choose a branch when you pull or push. There are two buttons on this dialog:
| Prune remote branches | Throw away remote branches that do not exist on the remote anymore. |
| Update all remote branch info | Fetch all remote branch information. |
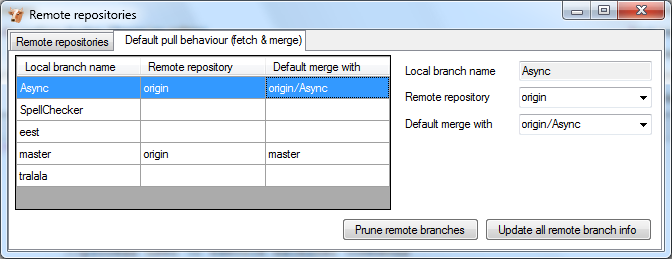
After cloning a repository you do not need to configure all remote branches manually. Instead you can checkout the remote branch and choose to create a local tracking branch.
Create SSH key
Git uses SSH for accessing private repositories. SSH uses a public/private key pair for authentication. This means you need to generate a private key and a public key. The private key is stored on your computer locally and the public key can be given to anyone. SSH will encrypt whatever you send using your secret private key. The receiver will then use the public key you send to decrypt the data.
This encryption will not protect the data itself but it protects the authenticity. Because the private key is only available to the sender, the receiver can be sure about the origin of the data. In practise the key pair is only used for the authentication process. The data itself will be encrypted using a key that is exchanged during this initial phase.
PuTTY and github
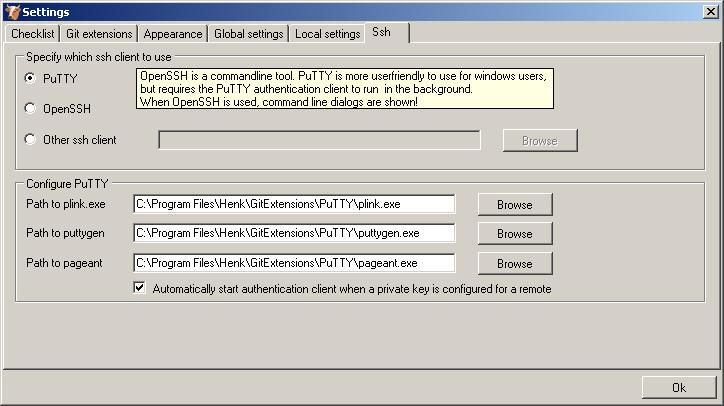
PuTTY is SSH client that for Windows that is a bit more user friendly then OpenSSH. Unfortunately PuTTY does not work with all servers. In this paragraph I will show how to generate a key for github using putty.
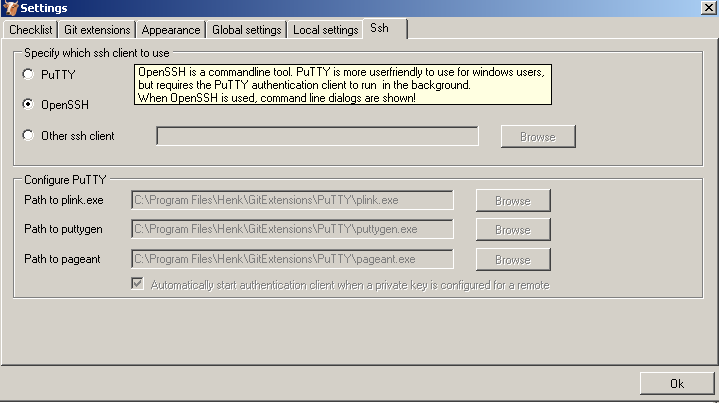
First make sure GitExtensions is configured to use PuTTY and all paths are correct.
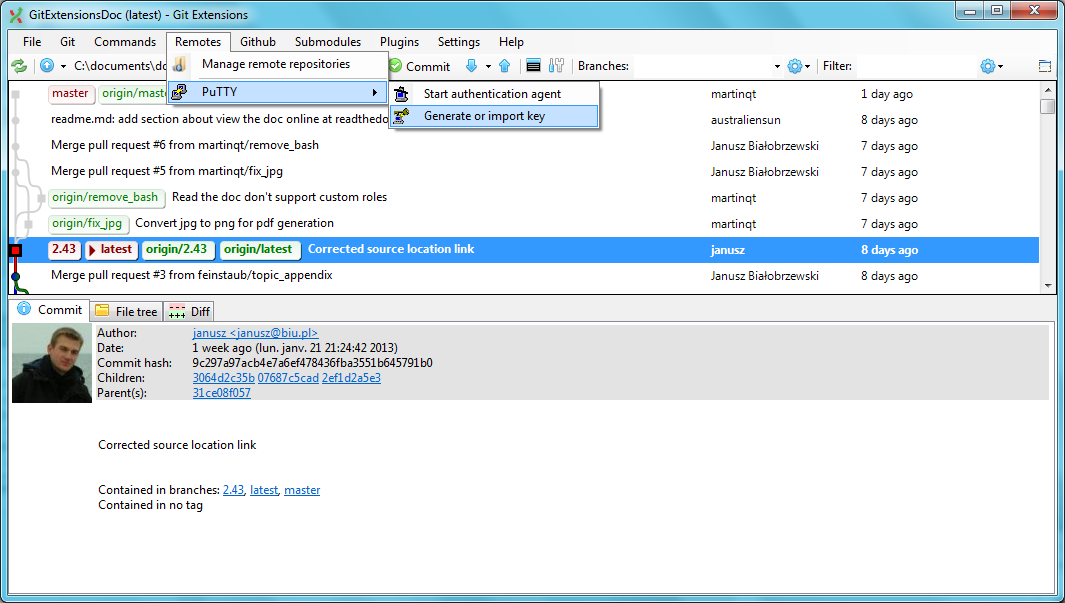
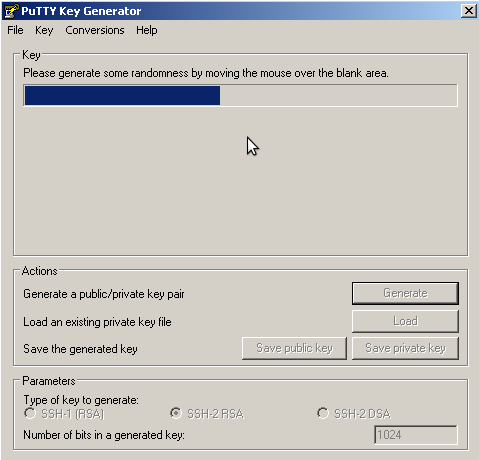
can choose Generate or import key to start the key generator.
|
|
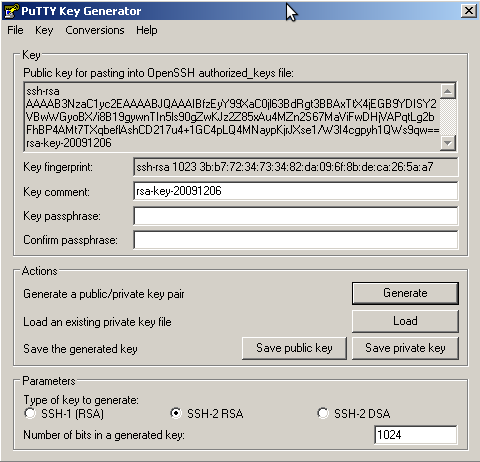
PuTTY will ask you to move the mouse around to generate a more random key. When the key is generated you can save the public and the private key in a file. You can choose to protect the private key with a password but this is not necessary.
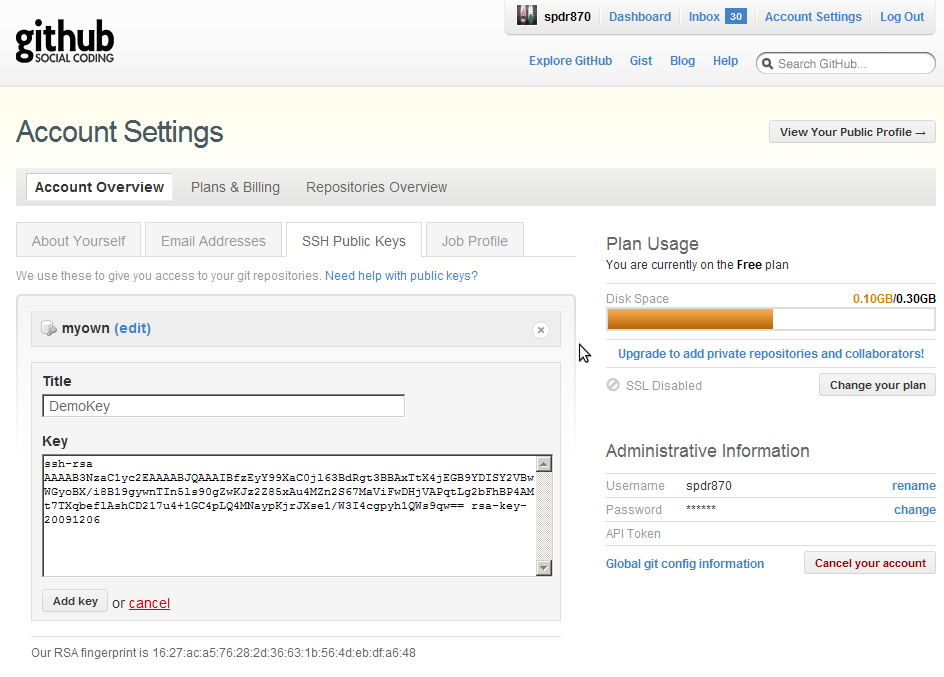
Now you have a key pair you need to give github the public key. This can be done in Account Settings in the tab
SSH Public Keys. You can add multiple keys here, but you only need one key for all repositories.
After telling github what public key to use to decrypt, you need to tell GitExtensions what private key to use to encrypt.
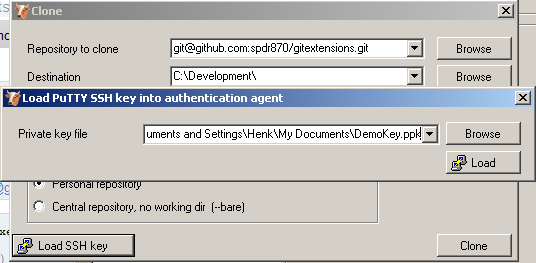
In the clone dialog there is a Load SSH key button to load the private key into the PuTTY authentication agent. This can
also be done manually by starting the PuTTY authentication agent and choose add key in the context menu in the system tray.
GitExtensions can load the private keys automatically for you when communicating with a remote. You need to configure the private key for the remote.
This is done in the Manage remote repositories dialog.
OpenSSH and github
When you choose to use OpenSSH you need to configure GitExtensions as shown in the screenshot below.
OpenSSH is the best SSH client there is but it lacks Windows support. Therefore it is slightly more complex to use. Another drawback is that GitExtensions cannot control OpenSSH and needs to show the command line dialogs when OpenSSH might be used. GitExtensions will show the command line window for every command that might require a SSH connection. For this reason PuTTY is the prefered SSH client in GitExtensions.
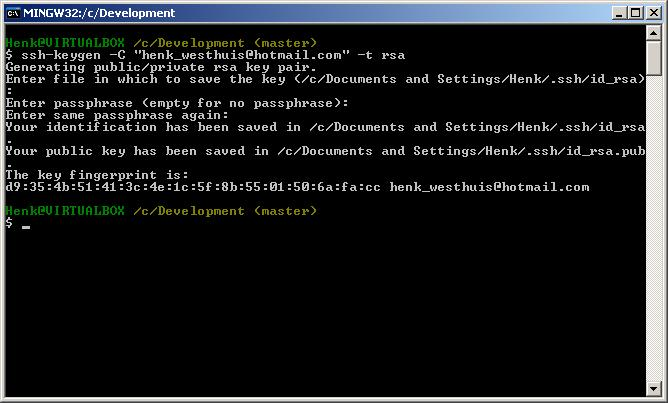
To generate a key pair in OpenSSH you need to go to the command line. I recommend to use the git bash because the path to OpenSSH is already set.

Type the following command: ssh-keygen -C "your@email.com" -t rsa
Use the same email address as the email address used in git. You will be asked where if you want to protect the private
key with a password. This is not necessary. By default the public and private keys are stored in
c:\Documents and Settings\[User]\.ssh\ or c:\Users\[user]\.ssh\.
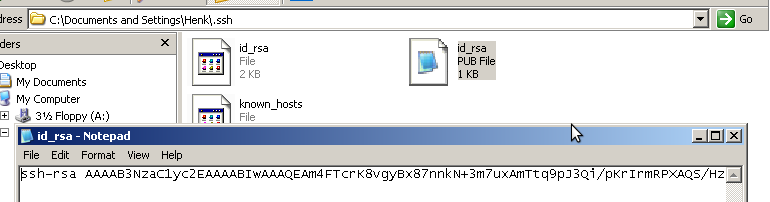
You do not need to tell GitExtensions about the private key because OpenSSH will load it for you. Now open the public
key using notepad and copy the key to github. This can be done in Account Settings in the tab SSH Public Keys
on GitHub.
Pull changes
You can get remote changes using the pull function. Before you can pull remote changes you need to make sure there are no uncommitted changes in your local repository. If you have uncommitted changes you should commit them or stash them during the pull. You can read about how to use the stash in the Stash chapter.
In order to get your personal repository up-to-date, you need to fetch changes from a remote repository. You can do this using
the Pull dialog. When the dialog starts the default remote for the current branch is set. You can choose another remote
or enter a custom url if you like. When the remote branches configured correctly, you do not need to choose a remote branch.
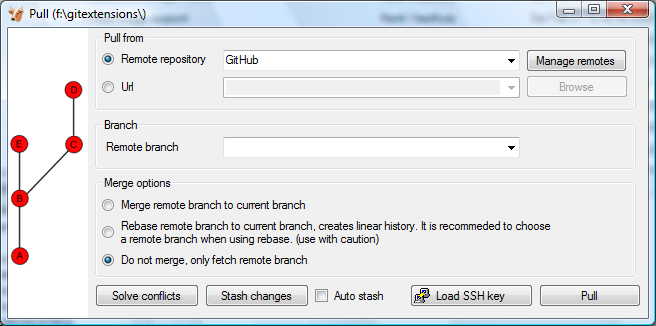
If you just fetch the commits from the remote repository and you already committed some changes to your local repository, the commits will be in a different branch. In the pull dialog this is illustrated in the image on the left. This can be useful when you want to review the changes before you want to merge them with your own changes.
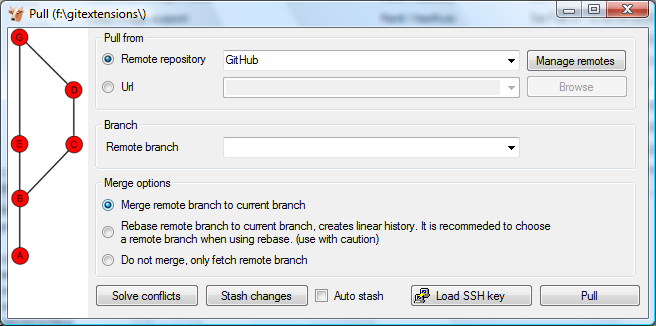
When you choose to merge the remote branch after fetching the changes a branch will be created, and will be merged into your commit. Doing this creates a lot of branches and merges, making the history harder to read.
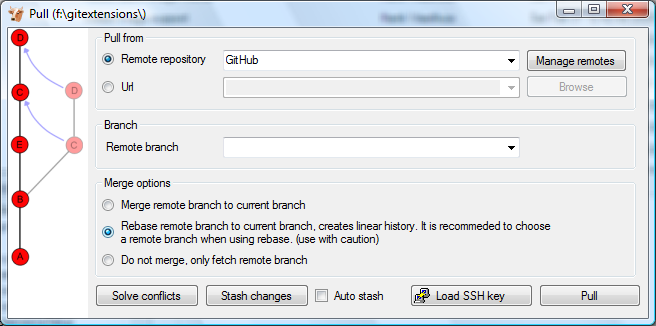
Instead of merging the fetched commits with your local commits, you can also choose to rebase your commits on top of the fetched commits. This is illustrated on the left in the image below. A rebase will first undo your local commits (c and d), then fetch the remote commits (e) and finally recommit your local commits. When there is a merge conflict during the rebase, the rebase dialog will show.
Next to the pull button there are some buttons that can be useful:
| Solve conflicts | When there are merge conflicts, you can solve them by pressing this button. |
| Stash changes | When the working dir contains uncommitted changes, you need to stash them before pulling. |
| Auto stash | Check this checkbox if you want to stash before pulling. The stash will be reapplied after pulling. |
| Load SSH key | This button is only available when you use PuTTY as SSH client. You can press this button to load the key configured for the remote. If no key is set, a dialog will prompt for the key. |
Push changes
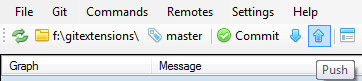
In the browse window you can check if there are local commits that are not pushed to a remote repository yet. In the image below the green labels mark the position of the master branch on the remote repository. The red label marks the position of the master branch on the local repository. The local repository is ahead three commits.

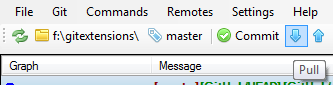
To push the changes press Push in the toolbar.
The push dialog allows you to choose the remote repository to push to. The remote repository is set to the remote of the current branch. You can choose another remote or choose a url to push to. You can also specify a branch to push.

Tags are not pushed to the remote repository. If you want to push a tag you need to open the Tags tab in the dialog. You
can choose to push a singe tag or all tags. No commits will be pushed when the Tags tab is selected, only tags.
You can not merge your changes in the remote repository. Merging must be done locally. This means that you cannot push your changes before the commits are merged locally. In practice you need to pull before you can push most of the times.