Getting Started
Installation
The single click Git Extensions installer can be found here.

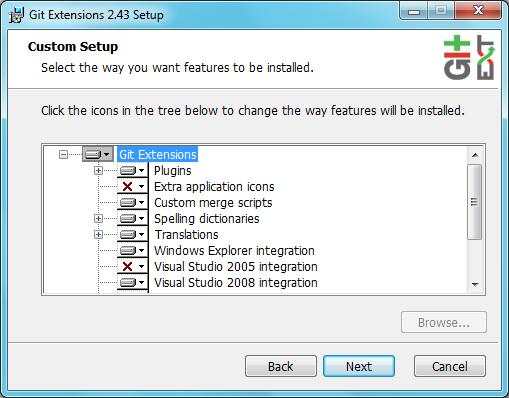
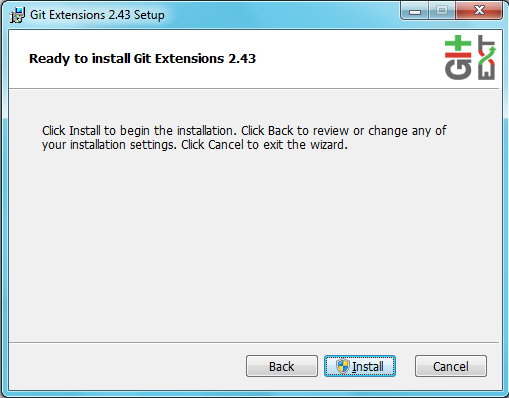
Choose the options to install.
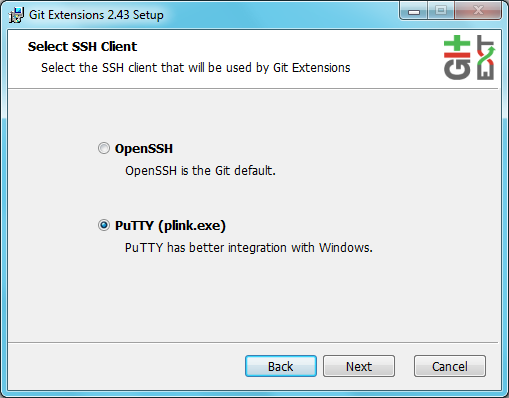
Choose the SSH client to use. PuTTY is the default because it has better Windows integration.
Installation (Linux) (2.5x only)
You can watch this video as a starting point: Install Git Extensions on Ubuntu 11.04
For further help go to https://groups.google.com/forum/?fromgroups=#!forum/gitextensions
This section only covers mono installation, you should have git installed in your Linux at this point. Please refer to https://git-scm.com/download/linux
First, make sure you have the latest mono version on your Linux. This section will cover installation of Mono 4.6 on a Linux.
Install mono latest version. You can always check for this here: http://www.mono-project.com/download/#download-lin
If everything went okay, you should open your terminal and check mono version:
$ mono --version
Mono JIT compiler version 4.6.1 (Stable 4.6.1.5/ef43c15 Wed Oct 12 09:10:37 UTC 2016)
Copyright (C) 2002-2014 Novell, Inc, Xamarin Inc and Contributors. www.mono-project.com
    TLS:           __thread
    SIGSEGV:       altstack
    Notifications: epoll
    Architecture:  amd64
    Disabled:      none
    Misc:          softdebug
    LLVM:          supported, not enabled.
    GC:            sgen
Now download Git Extensions latest version from https://github.com/gitextensions/gitextensions/releases/latest. Remember to select the appropriate package otherwise you could have problems.
Browse into the folder where you extracted the package and just run mono command, like the example below:
$ mono GitExtensions.exe
Installation (macOS) (2.5x only)
This section only covers mono installation, you should have git installed in your Mac at this point. Please refer to https://git-scm.com/download/mac
First, make sure you have the latest 32-bit mono version on your Mac. This section will cover installation of Mono 4.6 on a Mac.
Download mono latest version. You can always check for this here: http://www.mono-project.com/download/#download-mac
After you have completed the download, you will see a .dmg file. Double click it to open the package.
Inside the .dmg file you will have MonoFramework-{version}.pkg. Double click to start the installation process.
Follow the wizard until it’s completion.
If everything went okay, you should open your terminal and check mono version:
$ mono --version
Mono JIT compiler version 4.6.1 (mono-4.6.0-branch-c8sr0/abb06f1 Fri Sep 23 19:24:23 EDT 2016)
Copyright (C) 2002-2014 Novell, Inc, Xamarin Inc and Contributors. www.mono-project.com
    TLS:           normal
    SIGSEGV:       altstack
    Notification:  kqueue
    Architecture:  x86
    Disabled:      none
    Misc:          softdebug
    LLVM:          yes(3.6.0svn-mono-master/8b1520c)
    GC:            sgen
Now download Git Extensions latest version from https://github.com/gitextensions/gitextensions/releases/latest. Remember to select the appropriate package otherwise you could have problems.
Browse into the folder where you extracted the package and just run mono command, like the example below:
$ mono GitExtensions.exe
This is the minimal setup you need in order to run Git Extensions.
Troubleshooting Mac Installation
- If your Git Extensions crashes with an exception that a font is missing (generic sans serif), you probably can fix this by installing Xquartz. This is a version of the X.Org X Windows System that runs on OS X. I am not sure what the side effects are. This can be installed from here: http://xquartz.macosforge.org/landing/
- If Git Extensions still crashes because it is unable to load a plugin, empty the plugins folder.
Settings
All settings will be verified when Git Extensions is started for the first time. If Git Extensions requires any settings to be changed, the Settings dialog will be shown. All incorrect settings will be marked in red. You can ask Git Extensions to try to fix the setting for you by clicking on it. When installing Git Extensions for the first time (and you do not have Git already installed on your system), you will normally be required to configure your username and email address.
The settings dialog can be invoked at any time by selecting Settings from the Tools menu option.
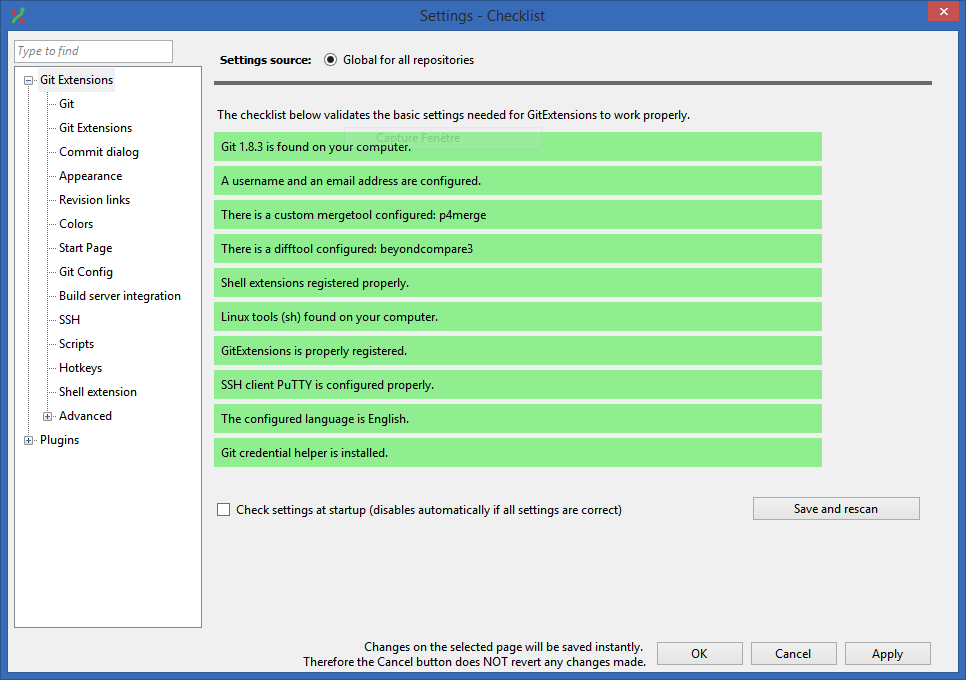
For further information see Settings.
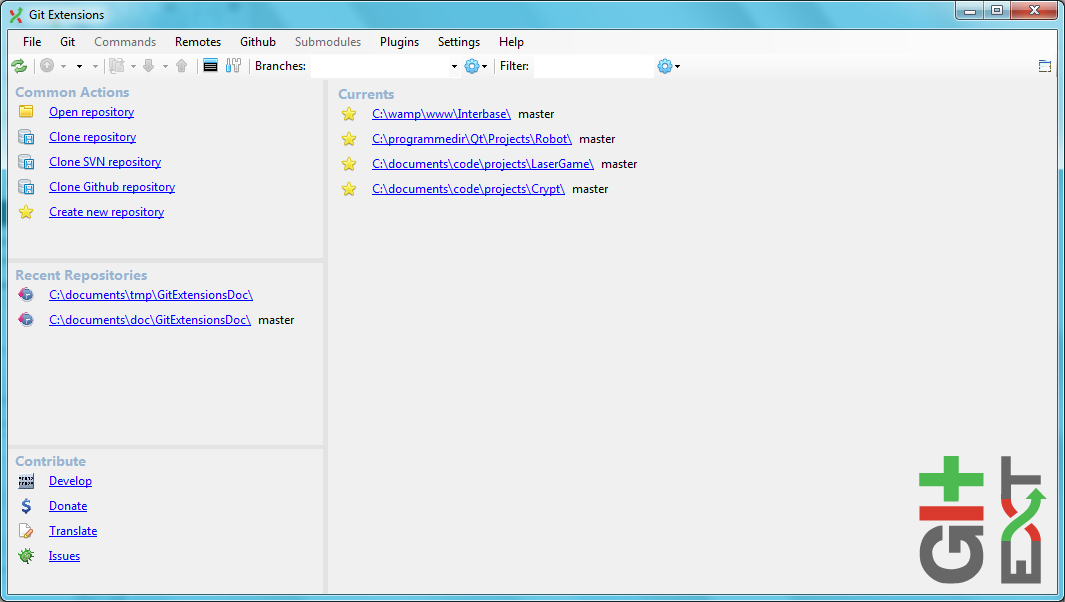
Start Page
The start page contains the most common tasks, recently opened repositories and favourites. The left side of the start page (Common Actions and Recent Repositories) is static. The right side of the page is where favourite repositories can be added, grouped under Category headings.
Recent Repositories can be moved to favourites using the repository context menu. Choose Move to category / New category to create a new category
and add the repository to it, or you can add the repository to an existing category (e.g. ‘Currents’ as shown below).
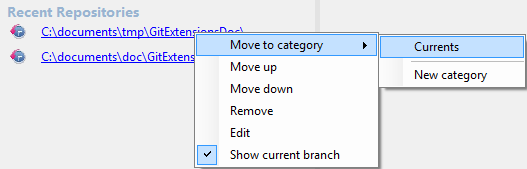
A context menu is available for both the category and the repositories listed underneath it.
Entries on Category context menu
| Move Up | Move the category (and any repositories under it) higher on the page. |
| Move Down | Move the category (and any repositories under it) lower on the page. |
| Remove | Remove the category (and any repositories under it) from the page. Note: Git repositories are not physically removed either locally or remotely. |
| Edit | Shows the Start Page settings window where both category and repository details can be modified. |
Entries on repository context menu
| Move to category | Move the repository to a new or existing category. |
| Move up | Move the repository higher (within the category). |
| Move down | Move the repository lower (within the category). |
| Remove | Remove the repository from the category. Note: the repository is not physically removed either locally or remotely. |
| Edit | Shows the Start Page settings window where both category and repository details can be modified. |
| Show current branch | Toggles the display of the branch name next to the repository name. This identifies the currently checked out branch for the repository. |
To open an existing repository, simply click the link to the repository under Recent Repositories or within the Categories that you have set up, or select Open repository (from where you can select a repository to open from your local file system).
To create a new repository, one of the following options under Common Actions can be selected.
Clone repository
You can clone an existing repository using this option. It displays the following dialog.
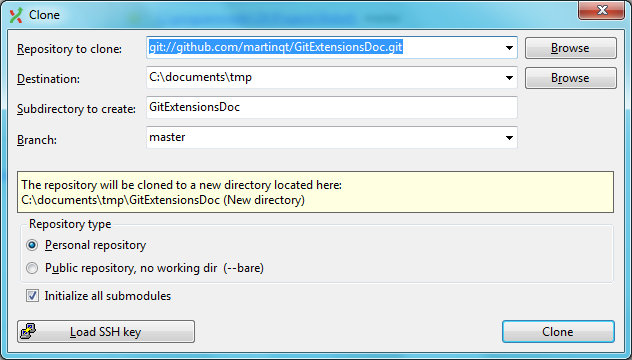
The repository you want to clone could be on a network share or could be a repository that is accessed through an internet or intranet connection. Depending on the protocol (http or ssh) you might need to load a SSH key into PuTTY. You also need to specify where the cloned repository will be created and the initial branch that is checked out. If the cloned repository contains submodules, then these can be initialised using their default settings if required.
There are two different types of repositories you can create when making a clone. A personal repository contains the complete history and also contains a working copy of the source tree. A central repository is used as a public repository where developers push the changes they want to share with others to. A central repository contains the complete history but does not have a working directory like personal repositories.
Clone SVN repository
You can clone an existing SVN repository using this option, which creates a Git repository from the SVN repository you specify. For further information refer to the Pro Git book.
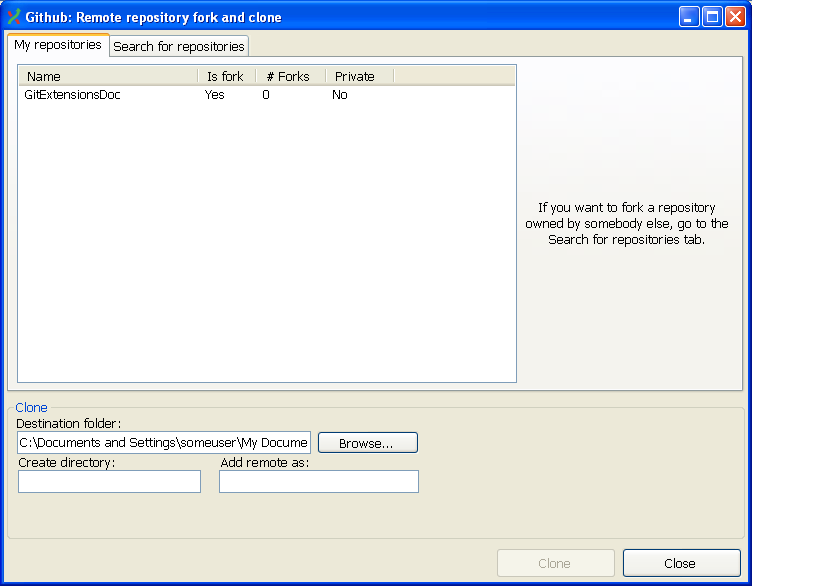
Clone Github repository
This option allows you to
- Fork a repository on GitHub so it is created in your personal space on GitHub.
- Clone any repositories on your personal space on GitHub so that it becomes a local repository on your machine.
You can see your own personal repositories on GitHub, and also search for repositories using the Search for repositories tab.
Create new repository
When you do not want to work on an existing project, you can create your own repository using this option.
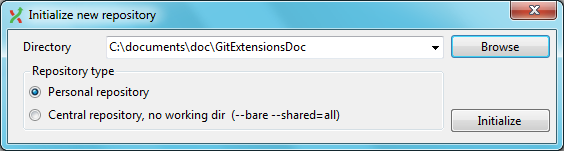
Select a directory where the repository is to be created. You can choose to create a Personal repository or a Central repository.
A personal repository looks the same as a normal working directory but has a directory named .git at the root level
containing the version history. This is the most common repository.
Central repositories only contain the version history. Because a central repository has no working directory you cannot checkout a revision in a central repository. It is also impossible to merge or pull changes in a central repository. This repository type can be used as a public repository where developers can push changes to or pull changes from.