Commit
A commit is a set of changes with some extra information. Every commit contains the following information:
- Changes
- Committer name and email
- Commit date
- Commit message
- Cryptographically strong SHA1 hash
Each commit creates a new revision of the source. Revisions are not tracked per file; each change creates a new revision of the complete source. Unlike most traditional source control management systems, revisions are not named using a revision number. Each revision is named using a SHA1, a 41 long characters cryptographically strong hash.
Commit changes
Changes can be committed to the local repository. Unlike most other source control management systems you do not need to checkout files before you start editing. You can just start editing files, and review all the changes you made in the commit dialog later. When you open the commit dialog, all changes are listed in the top-left.
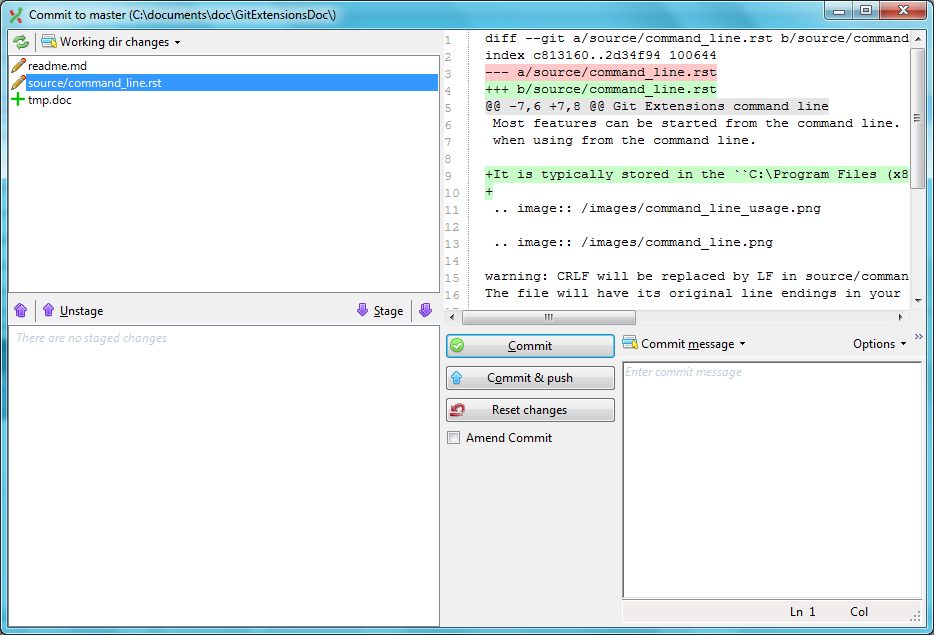
There are three kinds of changes:
| Untracked | This file is not yet tracked by Git. This is probably a new file, or a file that has not been committed to Git before. |
| Modified | This file is modified since the last commit. |
| Deleted | This file has been deleted. |
When you rename or move a file Git will notice that this file has been moved, but currently Git Extensions does not show this in the commit dialog.
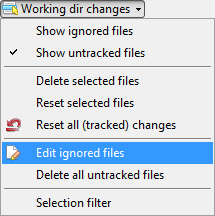
During your initial commit there are probably lots of files you do not want to be tracked. You can ignore these files by not
staging them, but they will show every time. You can instead add them to the .gitignore file of your repository. Files that are
in the .gitignore file will not show up in the commit dialog again. You can open the .gitignore editor from the menu
Working dir changes by selecting Edit ignored files.
Making a commit is a two step procedure:
- Staging the changes to be committed, which saves a snapshot of the changes into the Git “index”.
- Committing those staged changes, which records the staged changes and other information into the repository.
You do not have to commit immediately after staging changes. You can close the commit dialog, make further changes to the files in the working dir, then re-open the commit dialog to stage further changes and commit. Changes that you have staged previously will still be staged when you re-open the dialog.
Staging changes
The changes that you have made to your working directory are not automatically included in a commit. You must choose
which of the changed files, or individual changes from within those files, will be included in the commit by “staging” the
changes in Git Extensions. Staging changes in Git Extensions is the same as using git add on the Git command line.
You can stage the changes you want to commit by selecting the files in the top-left or “Unstaged changes” pane and pressing
the Stage button or pressing the [S] key. The file entries will move to the lower left or “Staged changes” pane. You
need to stage deleted files because you stage the change and not the file. If you have staged changes from a file and you
wish to exclude those changes from the commit, select the entry in the staged changes pane and press the Unstage
button or press the [U] key.
If the file that is selected in either the unstaged or staged changes pane is text format, Git Extensions will show a Git “diff” view in the right side pane of the window.
Staging selected lines
You do not have to commit all of the changes in a text format file in one commit. You can select and stage individual lines from within a file such that only the chosen lines will be included in your next commit; the remaining changes in the file will appear as unstaged changes for the next commit.
In the diff view on the right, select the line or lines that you want to stage then right-click and choose Stage selected
line(s) or press the [S] key. The file will now appear in both the staged changes and unstaged changes panes on the left
since now there are both staged and unstaged changes in the same file. The change that was selected will disappear from the
diff view on the right because the diff view is showing only the unstaged changes.
To see the line changes that have been staged select the entry for the file in the staged changes pane. To unstage selected
changed lines from a file, select that file in the staged changes pane, then select the line or lines in the diff view, right
-click, and choose Unstage selected line(s) or press the [U] key.
Note
If you select an entire line including the end-of-line character then staging or unstaging that line will include both the selected line and the next line. To select a single line to stage or unstage you may simply click onto the line without selecting any particular characters.
Note
Staging and unstaging individual lines from a file does not change the file itself. It is simply choosing which changes from within that file will be included in the next commit.
Undoing or resetting changes
You can undo or reset changes to files from the commit dialog. You can only do this from the top-left or “Unstaged changes”
pane. If you have already staged the changes then you must first unstage them as described above. To reset the changes in a
file, select the file in the unstaged changes pane, right-click and choose Reset file or directory changes or press the
[R] key.

You can reset individual changed lines in a similar way to staging and unstaging individual lines, which are described above.
To reset an individual line, select the line or lines in the diff view on the right then right-click and choose Reset
selected lines or press the [R] key.
Warning
Resetting changes modifies the file, discarding either all of the changes or the changes on the selected lines.
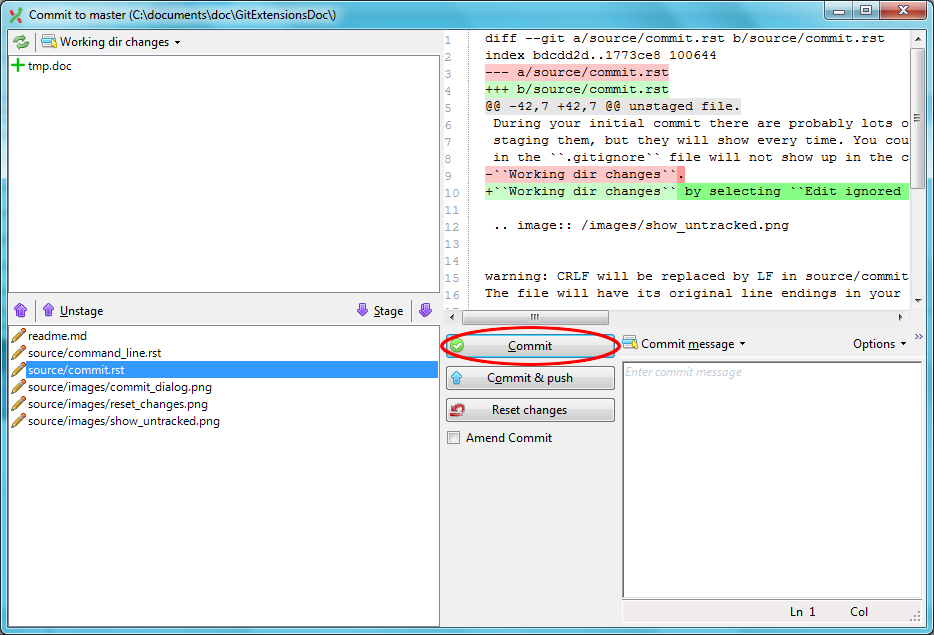
Making the commit
When all the changes you want to commit are staged, enter a commit message into the lower-right pane and press the commit button.
It is also possible to add changes to your last commit by checking the Amend Commit checkbox. This can be very useful when you
forgot some changes. This function rewrites history; it deletes the last commit and commits it again including the added
changes. Make sure you only use Amend Commit when the commit is not yet published to a remote repository.
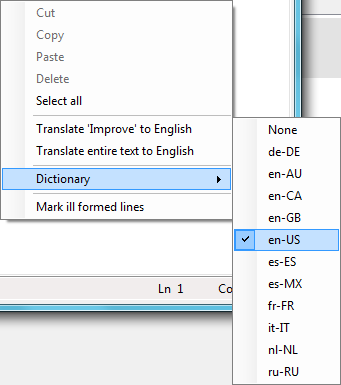
There is a built-in spelling checker that checks the commit message. Incorrectly spelled words are underlined with a wavey red line. Right-click on the misspelled word to choose the correct spelling or choose one of the other options.
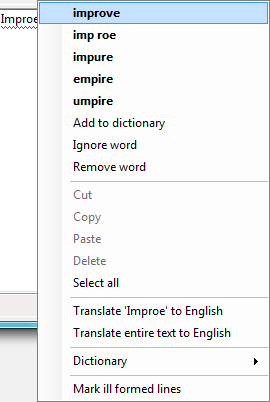
Git Extensions installs a number of dictionaries by default. You can choose another language in the context menu of the
spelling checker or in the settings dialog. To add a new spelling dictionary add the dictionary file to the Dictionaries
folder inside the Git Extensions installation folder.
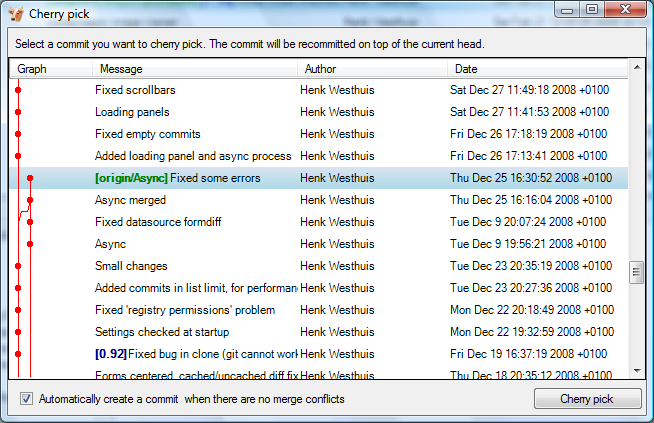
Cherry pick commit
A commit can be recommitted by using the cherry pick function. This can be very useful when you want to make the same change on multiple branches.
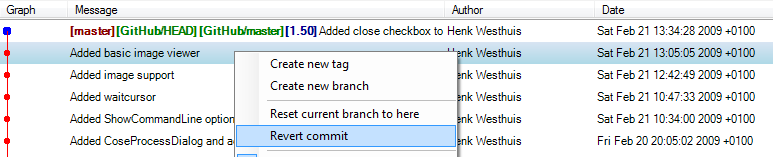
Revert commit
A commit cannot be deleted once it is published. If you need to undo the changes made in a commit, you need to create a new commit that undoes the changes. This is called a revert commit.
Stash changes
If there are local changes that you do not want to commit yet and not want to throw away either, you can temporarily stash them. This is useful when working on a feature and you need to start working on something else for a few hours. You can stash changes away and then reapply them to your working dir again later. Stashes are typically used for very short periods.
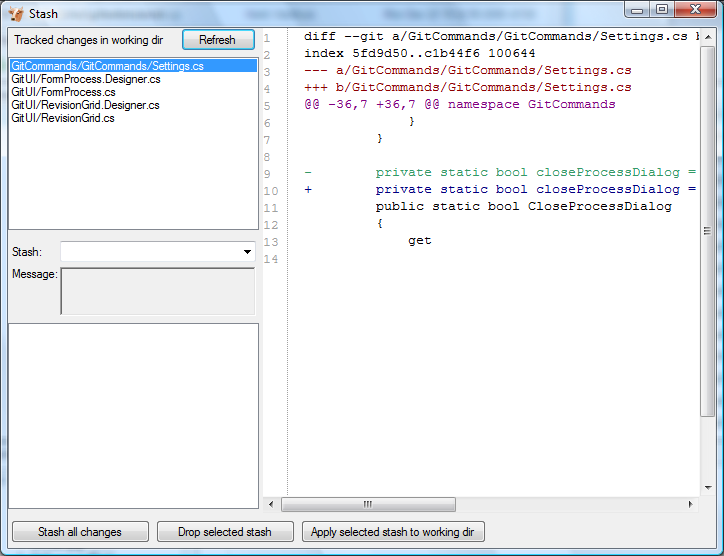
You can create multiple stashes if needed. Stashes are shown in the commit log with the text [stash].

The stash is especially useful when pulling remote changes into a dirty working directory. If you want a more permanent stash, you should create a branch.